

Not long ago I saw this link for a 3310 temp probe.
Now ive played with other LCD’s lots, but this one caught my attention because of the low power requirements (It runs from a single CR2032 Motherboard battery). I built the Temp probe as shown on the site and it worked well. I had several of the PCBs made, and decided that the others would be my own projects with the same hardware. I wondered what I could push this simple PIC and Nokia LCD into doing.
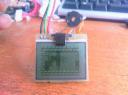
I started by writing the base code from scratch. The simple routines to init the LCD and display on it. My first program shown above (The Unicorn) simply plotted a static picture from ROM onto the display.
 <- Left is the original while Right ->
 is mine.
You can get the .hex file for the Unicorn picture on pic 12f675 here. The hardware as exactly as the original Temp probe spec (but you dont need temp probe, and set the jumper high).
You can get the source code here for the basic LCD setup.
For a laugh I thought id draw the HardOCP logo, you cant do much with 84×48 2colour!

Coming next in part 2 – Moving game elements
UPDATE – 31-May-2007
Actualy, nothing moving yet. But I have gone onto character mapped graphics. I started writing a boulderdash clone! The incredibly small amount of Ram/Rom on the 8pin pic is quite a limit, making it a challenge to fit the code in at best. Starting off with a pic12f629, then onto a 675.

You can see ive managed to draw a basic map on the screen. The size of this map is limited by the ram, as the objects within have to change it cant be a rom map. There isnt enough RAM. Ive had to be very clever with ram byte handing to squeeze a large map into ram. Having static map layouts in rom isnt quite as bad.
Anyway, im about to add movement to the player and put some basic game logic in. Then its onto maps larger than the screen that scroll. This is still the original hardware from the temp probe, no changes other than removing the temp sensor and using the single input for player control 🙁
UPDATE – 1-June-2007
Reaching the limits of the 12f675 now. Rom is at 94% and ram at 92% full. I have a scrolling level now. Rocks Fall, if your under them you die. When you go near the edge of the screen it scrolls on the next part of the level.
Thats about as much as Ill get out of the 8pin pic. Here is the video!


UPDATE – 19 June 2007
New pic. 12f683, Loads more rom and Ram. I started optimising the code and making use of the bigger chip (memory wise, not size).
Ive redrawn the graphics to get a nicer look, drawn in the Geg graphics and finished the gravity routine. Also now, multiple levels! There is an exit and you can collect gems before you are allowed out. I have 4 levels in rom, copied to ram for playing. Space for more but I want to finish the game code before filling the rom with levels.

 Watch the new video (not much visibly changed except the graphics. I need to make a proper joystick so i can move up/down before I can easily demo the full game. I think the joystick is next. Lets see how YOU do that with only 1 input pin!
UPDATE – 22 June 2007
Got 4way input working. A small resistor network with buttons shorting different values. Means I can detect any single button press on one analog input pin.
Scrolling levels are now fully working, up down/left right etc. You can collect gems and head for the exit! All game logic for a basic game is now in place. I can design some levels and actually play now.
I have the latest video show all this here if you want to see.
