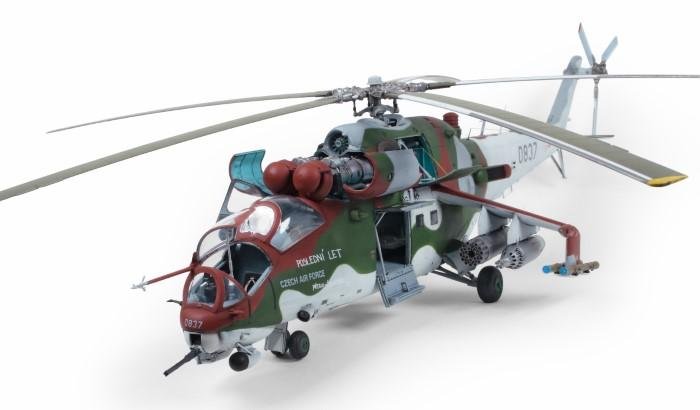
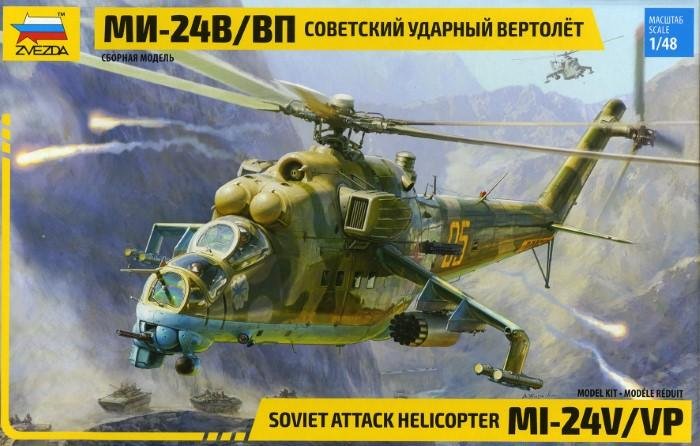
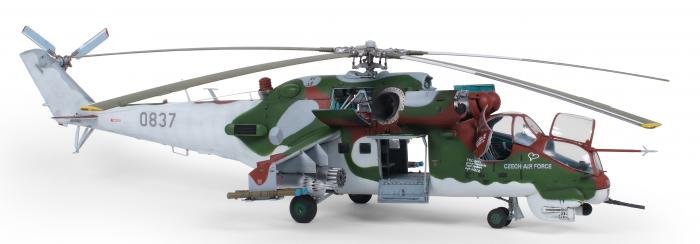
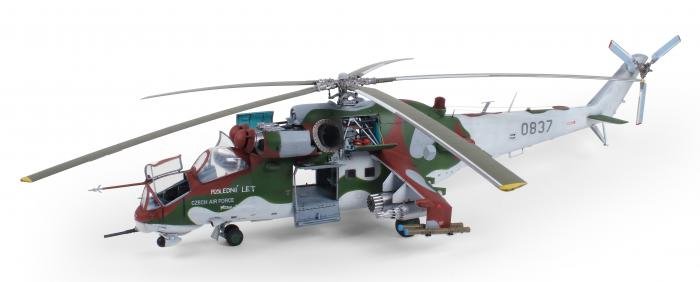
Duncan Cooke builds Zvezda’s newly tooled quarter-scale Mi-24V/VP Hind-D/E in a striking Czech Air Force scheme.
Created in part due to US successes in Vietnam with attack helicopters, Mil’s Mi-24 (NATO codename Hind) took this concept one stage further, adding the ability to carry a full combat squad.
Developed from a mock-up design by legendary Soviet aircraft designer Mikhail Mil, the Hind is based primarily on elements of the earlier Mi-8 Hip. The intent was to produce an aircraft to satisfy both the role of close air support and transportation of infantry directly into combat. The prototype design was designated V-24, and in 1968 a directive was given to proceed with the type’s development. Progress to prototype was completed in less than 18 months and this resulted in several significant handling and weapon sighting problems. A rework of the fuselage front section addressed most of these issues with modified Mi-24 (Hind-A) production airframes entering Soviet service in 1972. It was followed by the reconfigured Mi-24D (Hind-D), which introduced the now instantly-recognisable stepped cockpit and nose-mounted gun. The definitive Mi-24V/ VP (Hind-E) was manufactured from 1976 onwards, mating the heavy rocket and gun weapon fit with the advanced 9M114 Sturm (AT-6 Spiral) anti-tank missile. The Mi-24 and its various export versions have been operated by 48 other nations.
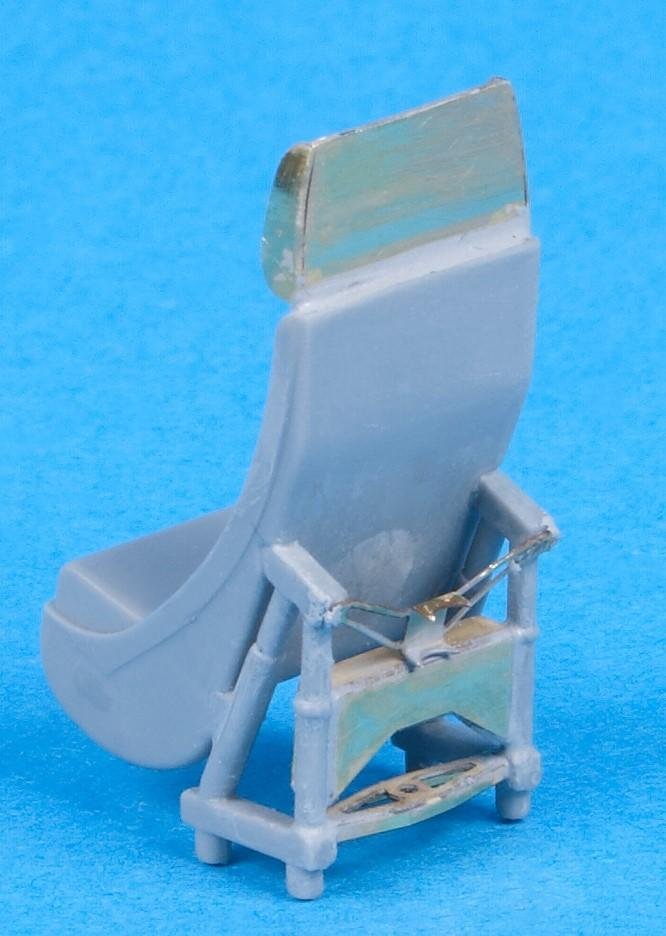
Above: The firm’s interior set was used to enhance the plain seats; the harnesses would be added once these items were painted.
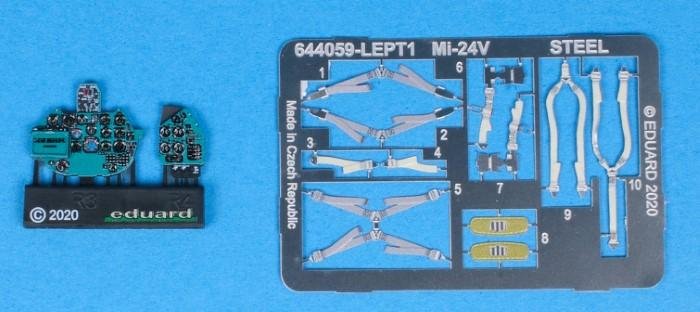
Above: It was also decided to utilise Eduard’s resin pre-printed Mi-24V Löök Instrument Panel and Steel Seatbelts set, as this addition provided a quick and simple upgrade for the interior.
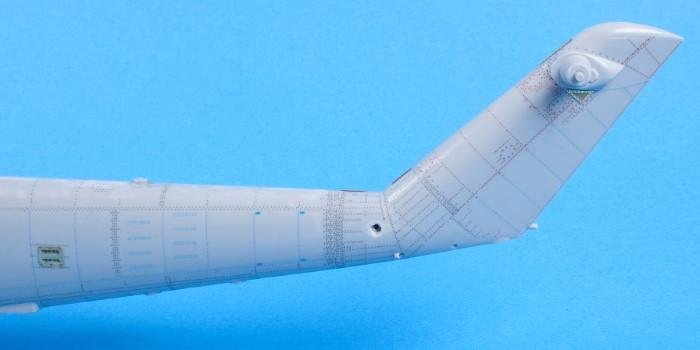
Above: The lack of raised rivets on the rear fuselage was remedied courtesy of Arma Models limited-run 3D rivet detail sheet (AM4843).
Starting point
Zvezda’s robust box is slightly oversized for the contents, and the subsequent movement of the runners during transportation had resulted in a few detachments of smaller parts within the enclosing bags, so modellers are advised to proceed with caution. Accompanying instruction sheets are clear and intuitive, but as with the coloured painting/markings guide, access to good reference sources is advantageous. Paints are matched to Zvezda’s brand along with questionable Tamiya equivalents... these need to be checked against available references.
The grey styrene is well moulded and has excellent fine detail, with one notable exception: the external surfaces. While neatly finished with sharp, recessed panel lines, one of the most distinctive features of the Mi-24 is missing completely: surface rivet detail. Without wishing to be drawn into the age-old ‘rivet counter’ dialogue, this is potentially a major oversight for this aircraft type and in this modeller’s opinion, needs to be addressed – but more of that later.
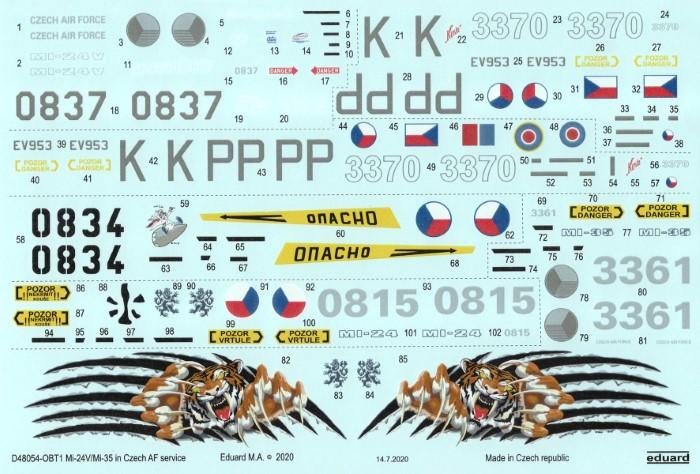
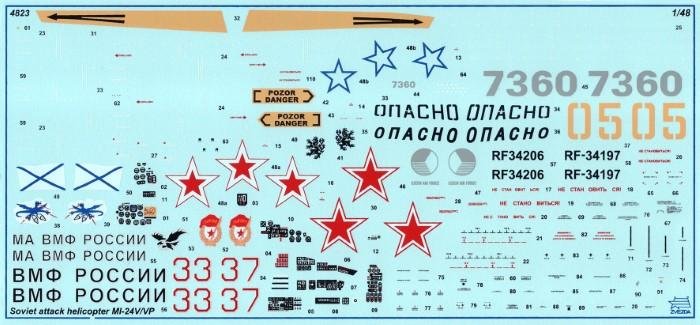
Above: Eduard’s splendid decal sheet provided markings for several Czech airframes, being well printed and displaying perfect register.
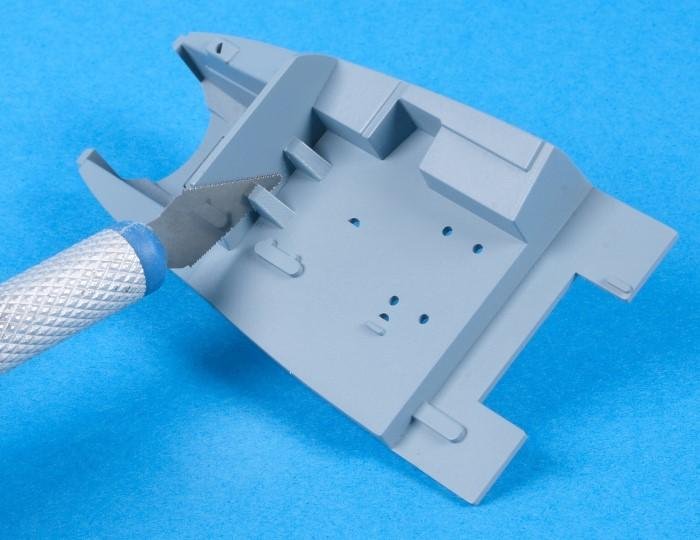
Above: The pilot’s moulded rudder pedals were removed using a mini razor saw to make way for a new PE floor panel.
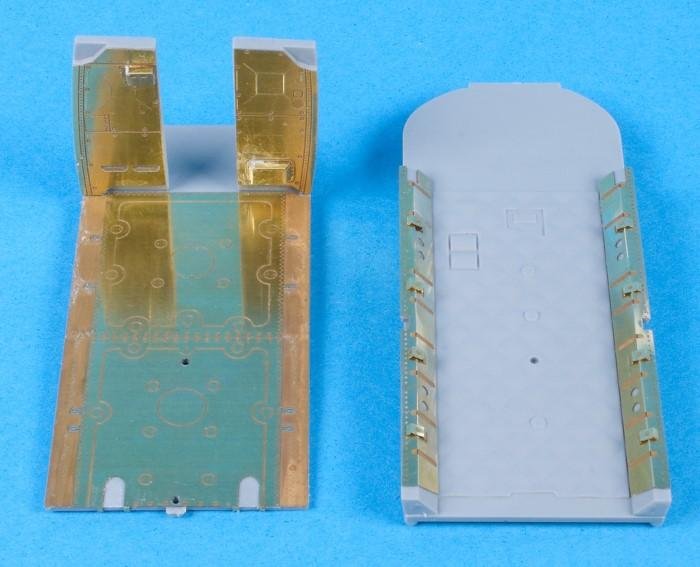
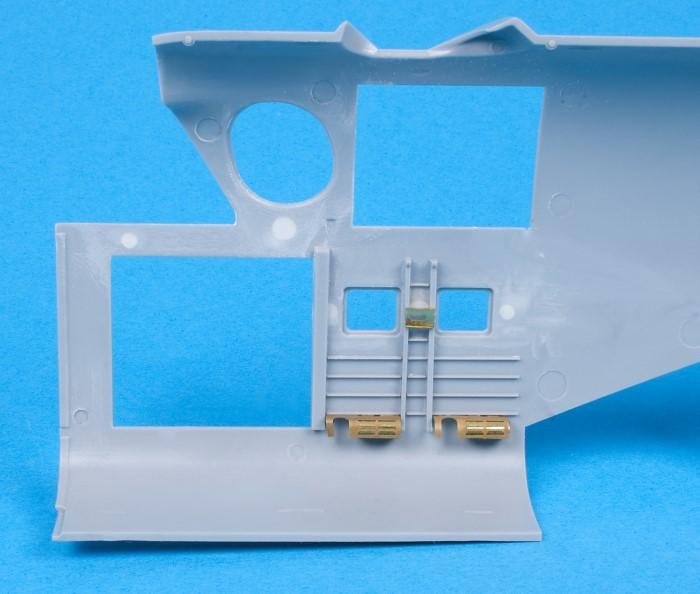
Above: The cabin floor and ceiling also benefited from PE embellishments, with the floor section featuring accurate seat and tie-down points.
| Soviet Attack Helicopter Mi-24V/VP | |
|---|---|
| By: | Zvezda |
| Stock Code: | 4823 |
| Scale: | 1/48 |
| Price: | £42.50 |
| Available from: | www.hobbyco.net |
Additional items
As might be expected, aftermarket companies have been quick to issue upgrade sets for this kit, and Czech-firm Eduard (www.eduard.com) has produced an excellent range, including decals. Its Mi-24V/ Mi-35 in Czech Air Force service (D48054) was the chosen option for this build, supplemented by its D48060 set of Czech-language stencils. While a broad selection was assembled for this project, they were utilised to varying degrees and it’s down to the individual modeller’s choice as to which extras they add.
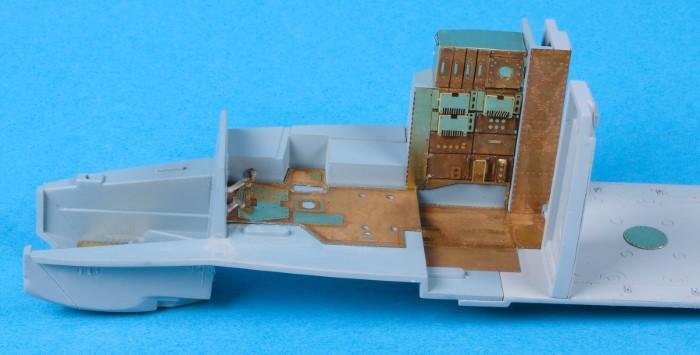
Above: Panels located behind the pilot’s seat were built from numerous elements provided in Eduard’s interior set and replaced the otherwise blank, flat areas on Part D15.
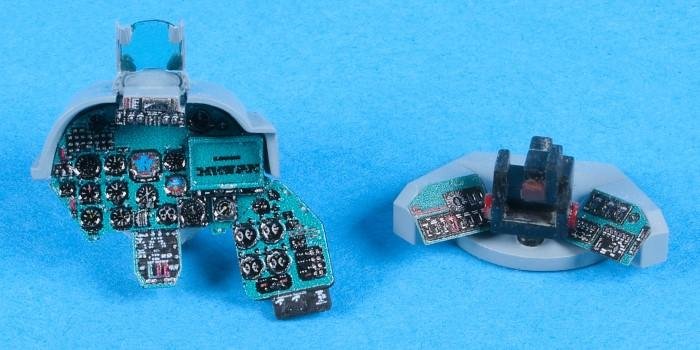
Above: Once fitted Eduard’s Löök instrument panel transformed the appearance of the cockpit, with convincing dials and displays, making for an excellent centre-piece.
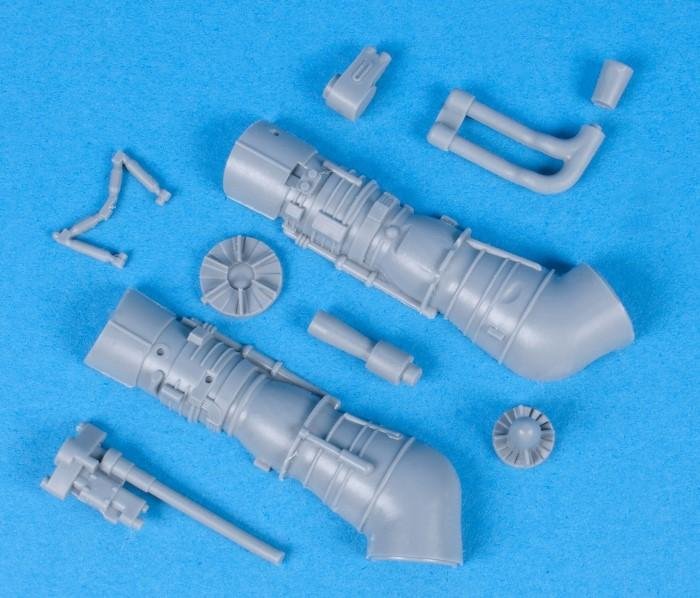
Above: Each of the engine sub-assemblies comprise ten components, with most being attached to the main section, which came in horizontally split halves.

Above: Similarly, the gearbox was a well-detailed unit straight from the box, although it and the powerplant would later gain lead wire ‘piping’.
Furthermore, New Ware’s NWAM0717 Mi-24V/VP Expert masks (http://mek.kosmo.cz/newware) were acquired to aid the painting, while Arma Models (www.arma-models.ru) was kind enough to provide an example of its limited-run 3D rivet detail sheet (AM4843). This was produced and issued with customer pre-orders from Arma Models for the kit; unfortunately, it is not yet currently available for one-off purchase. The following Eduard items were employed:
491097 Mi-24V PE Interior
481020 Mi-24V PE Interior Cargo
481019 Mi-24V PE Exterior
644059 Mi-24V Löök Instrument Panel and Steel Seatbelts
648587 Mi-24V Brassin
9A624 Machine Gun
648585 Mi-24V Brassin Pitot Tubes
648573 Mi-24V Brassin Wheels
648576 Brassin 9K114 Sturm Missiles
648575 Brassin B8V20 Rocket Pods
EX705 Masks
Inside out
As is common with most quarter-scale helicopter builds, assembly starts with the cockpit. Zvezda’s instructions have the pilot and weapons systems officer (WSO) positions built then added to the rear cabin, which includes both the floor and roof, with the engine, gearbox and ancillary systems installed above. This means careful planning is required to ensure any additional cockpit PE detail is added at the appropriate build stage otherwise fiddly manipulation is required to get everything in position correctly.
The cockpit seats are fairly plain as supplied, so the pilot’s received photo-etched (PE) detail from Eduard’s 491097, while cushions were fashioned from styrene card for this and the WSO position. Steel seatbelts from the Eduard Löök set (644059) were added after the paint finish was applied – the main shoulder harness was cut down so the threading and mounting, front-to-rear, could be shown.
Moulded rudder pedals in the pilot’s position were removed to allow fitment of the PE floor panel; new detailed items were then scratch-built from spare runner and fine mesh (for texture) taken from the spares box. Panels located behind the pilot’s seat were built from the numerous elements provided in the aforementioned PE set and the otherwise blank, flat styrene. Applied to the relevant side panel moulding with gel-based cyanoacrylate (CA) adhesive, these appeared very impressive; the advantage of this glue is it provides slightly more working time for final positioning than the liquid equivalent.
Above: Several rather noticeable ejector pin release marks were noted on the interior of the cabin, and these were filled and sanded prior to the addition of PE components.
Colour match
Prior to the application of the pre-painted PE instrument panels and the Löök assembly, the cockpit panels were painted. Czech aircraft references show the primary colour of the structural elements to be a blue/grey, not black as the instructions suggest. Mr. Color C307 Grey (www.albionhobbies.com) was selected and applied over a base of Mr. Paint MRP-084 Fine Surface Primer (Grey) (www.mrpaint.sk). Relevant panel sections were then masked and AK Interactive’s RC206 Russian Cockpit Turquoise (www.ak-interactive.com) was used in place of Zvezda’s 59-Emerald.
Over these base colours, the relevant pre-painted PE sections, together with the Löök instrument panel, were installed. Careful dry-brushing of the internal raised PE detail was undertaken with diluted Humbrol 56 Aluminium (www.humbrol.com). After a sealing coat of Johnson’s Klear, a wash of AMMO-MIG’s A.MIG-1611 Night Black Panel Line Wash (www.migjimenez.com) was applied to add grime and depth to the cockpit interior.
A similar dilemma occurs with the engine compartment plus internal surfaces of the associated covers, gearbox and cabin interior. The former is clearly a light turquoise/blue in the available references, while the gearbox assembly and rear cabin interior are a light grey tone. A 60:40 mix of RC253 Light Grey and RC206 Russian Cockpit Turquoise was deemed a good reference match for the aforementioned engine compartment and associated assemblies. Mr. Color’s C73 Aircraft Grey was eventually chosen for the gearbox and rear cabin interior, with crew seating finished in MRP-049 Light Grey-Blue. Although this trial-and-effort method of colour matching wasn’t ideal, it provided the closest approximation to the available references.
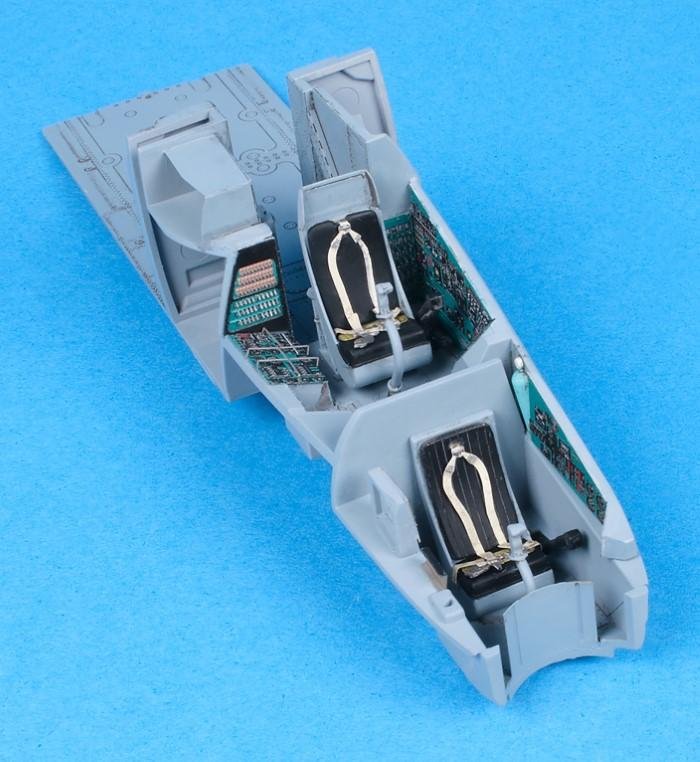
Above: The combination of pre-coloured PE and resin components transformed the cockpit’s appearance, with the interior tones matched to reference photos.
KROKODIL SCHEMES
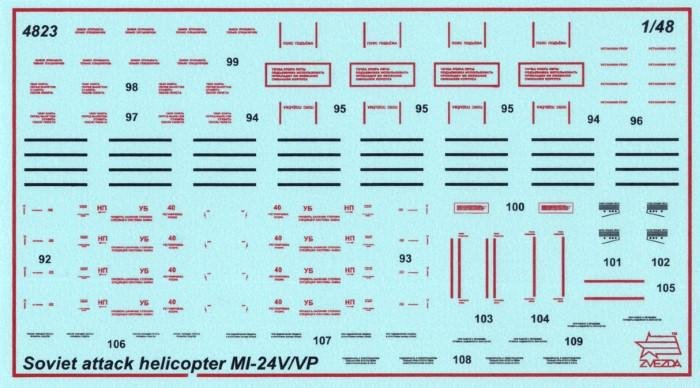
Zvezda supplies markings for four airframes on its well-printed decal sheet, along with comprehensive stencil data for the helicopter and weapons:
• Mi-24V, Yellow 05, 262nd Independent Helicopter Squadron, Soviet Forces, Bagram, Afghanistan, 1988
• Mi-24V, Grey 7360, 221st Helicopter Squadron, Czech Air Force, Roudnice nad Labem, 2012
• Mi-24VP, RF34206/Red 33, 125th Independent Helicopter Squadron, Russian Naval Baltic Fleet, Chkalovsk, 2015
• Mi-24VP, RF-34197/Red 37, 125th Independent Helicopter Squadron, Russian Naval Baltic Fleet, Chkalovsk, 2019
Half-time
Extinguisher bottles were added to the engine compartment floor/rear cabin ceiling, which was joined to the rear cabin bulkhead/APU and cockpit assembly running from the extinguishers, APU and around the engine, as the compartment covers were planned to be displayed in the open position. The powerplant sub-assemblies each comprised several parts, which build up upon the engine itself, which comes in halves, although clever design means there’s a very neat seam. Treated with MRP-084 Fine Surface Primer (Grey), the engine colour was built gradually via thin coats of Alclad II ALC-101 Aluminium, ALC-112 Steel, ALC-121 Burnt Iron and ALC-104 Pale Burnt Metal (www.alclad2.com). A used-finish was achieved using touches of ALC-413 Hot Metal Blue and ALC-417 Hot Violet; AK2033 Aircraft Engine Wash was then employed to highlight the moulded and PE detail.
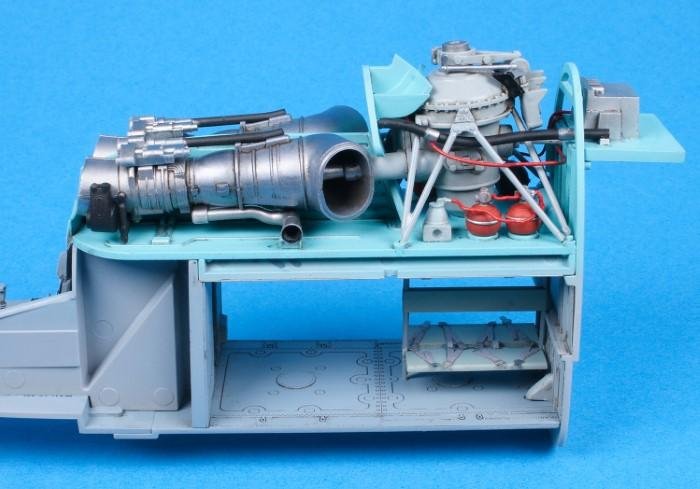
Above: Extinguisher bottles were added to the engine compartment floor/rear cabin ceiling, which was joined to the rear cabin bulkhead/auxiliary power unit (APU) housing. Additional piping detail was added with fuse wire.
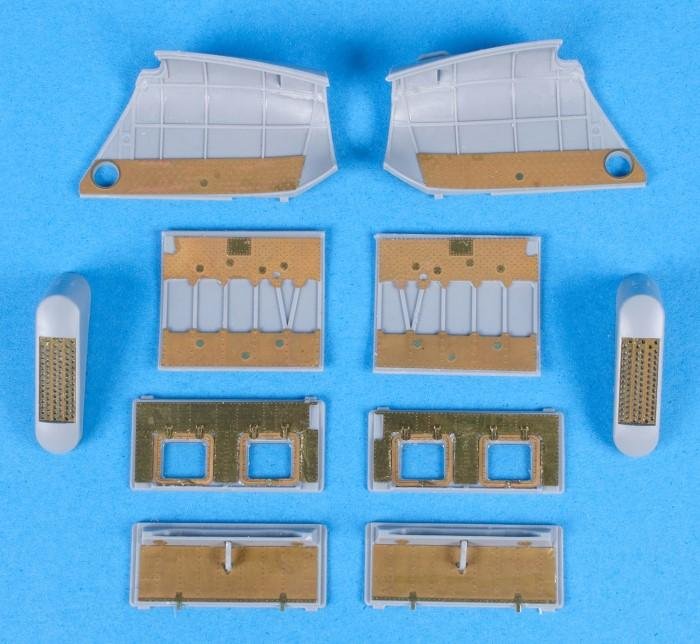
Above: Additional PE detail was applied to the engine compartment access doors as they were to be displayed in the open position – the oval units on each side are the ASO-2V flare dispensers.
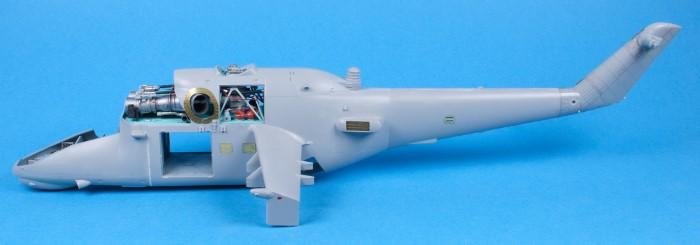
Above: Zvezda’s quality engineering in the way the fuselage halves closed neatly around the cockpit, cabin and engine sections with just minimal filling and sanding required.
Fuselage halves enclosed the finished cockpit, cabin and engine compartments. The main cabin was furnished with multiple elements from Eduard’s interior set, after which this section was airbrushed with C73 Aircraft Grey and, once dry, treated with A.MIG-1611 Night Black Panel Line Wash (PLW) to create a used look. After the fuselage halves were joined, a neat vertical seam is presented, which just needed the slightest application of Mr. Surfacer 500 (www.albionhobbies.com) to eliminate any gaps/blemishes. Any surface panel line detail softened by subsequent sanding was reinstated using a Mr. Scriber Black (narrow) tool (www.mrpaint.sk).
The front underside panel was added after the gun turret detail had been pre-installed and the nose wheel bay was detailed courtesy of Eduard’s 481019 Exterior set. As with the fuselage halves, the fit was good and seam correction was minimal, with the exception of the filling required around the PE nose wheel bay liners. Various surface ‘lumps and bumps’ were added at this point, together with key elements of surface detail from the aforementioned Eduard set prior to tackling the airframe exterior.
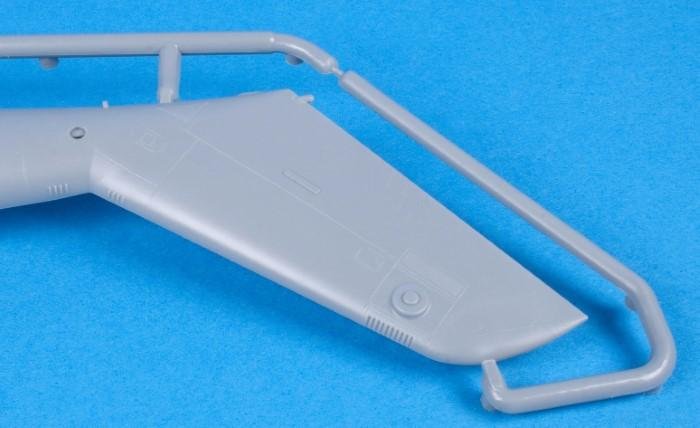
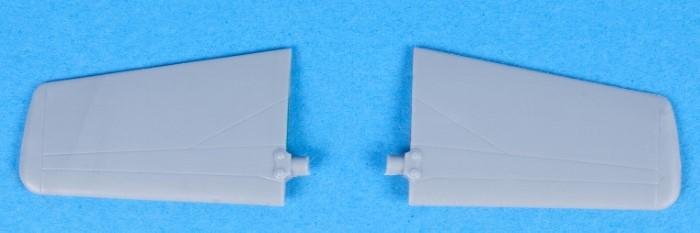
Above and below: The rear fuselage and horizontal stabilisers on real Mi-24s are festooned with raised rivets, yet this feature was lacking in Zvezda’s kit.
Riveting detail
As mentioned previously, the notable external rivet detail associated with the Hind is sadly lacking on Zvezda’s moulding. A remedy for this issue came from Arma Models and its 3D Rivet detail sheet (AM4843), which consists of fine resin-type detail printed in sections/patterns on to a very thin, clear carrier film. It includes a layout/placement diagram and the rivet patterns have been broken down and grouped in colour-coded sections, aiding with identification and accurate positioning.
A test application was undertaken on a piece of plastic card and this proved straightforward. Once satisfied, rivet patterns were trimmed to fit and secured with the aid of decal solution. After 24 hours, the treated areas were primed with Mr. Surfacer 1200 diluted with Mr. Color Leveling Thinner as the former has a greater ‘bite’ than other similar products. It also sought to minimise the risk of the rivet detail, primer and associated final paint coat lifting during subsequent masking.
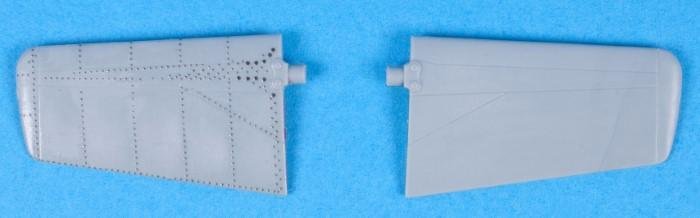
Above and below: While applying the resin rivets was a slow, painstaking process, made even more challenging by the thick carrier film, the results were striking and the detail looked even better after a wash had been added.
Close examination revealed that the edges of the trimmed 3D decals were quite evident beneath the primer and this distracted somewhat from the delicate surface detail presented. As trimming the carrier film wasn’t an option due to the fragile raised features, so instead 99% Isopropyl Alcohol (IPA) was brushed carefully on to the decal sections to dissolve the carrier film but leave the rivet detail in place. With practice, sections could be applied, the carrier film dissolved and the residue brushed away leaving the just the printed rivets in place. This was a slow, painstaking process, but once primed the result was neat and a considerable improvement.
Multiple stores
Five clear styrene pieces and a grey moulded internal door panel make up the cockpit glazing, and the glazing was cleaned, wiped with IPA and then dipped in Klear to maintain its clarity. When dry, any blemishes were polished and pieces re-dipped as required. Internal surfaces were then masked and C307 Grey airbrushed; once the coverings were removed, the non-opening sections were secured with AMMO-MIG’s Ultra Glue. The cockpit doors were held with White Tack prior to external masking and application of the overall primer and camouflage scheme. Despite the numerous components for the glazing, the fit was surprisingly good, with little or no modification required on the seams.
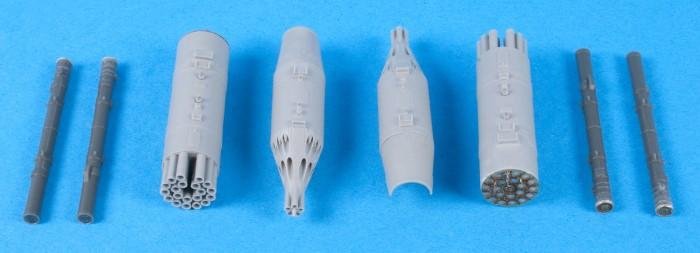
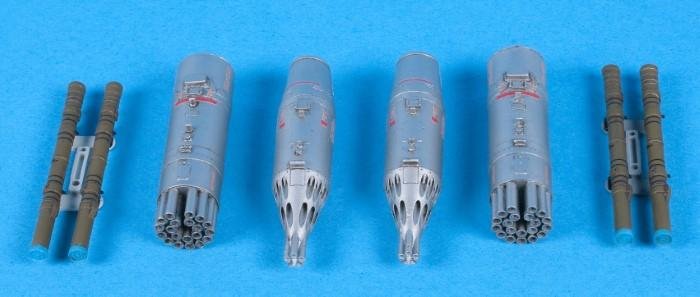
Above and below: It was decided to use Eduard’s Brassin 9K114 Sturm missiles, along with pairs of its B8V20 and UB-32A-24 rocket pods, making for a heavy weapons load – the inclusion of stencils with these accessories made for a neat finishing touch.
With the main fuselage completed, the remainder of the build can be easily divided into a series of sub-assemblies: these include the undercarriage, weapons and rotors. Helpfully, they can be completed independently and affixed to the fuselage after completion of the overall paint scheme, leaving just touch-up work and matt varnish.
Zvezda’s styrene was supplemented with Eduard’s 648573 Mi-24V Wheels; these are resin replacements, with much finer detail than the kit items. The included painting masks are a bonus. Similarly, the firm’s 648576 9K114 Sturm Missiles and 648575 B8V20 Rocket Pods are also excellent complementary additions, comprising resin components with full stencilling. A pair of Eduard’s UB-32A-24 pods – taken from the spares box – completed the weapons fit for the chosen Czech airframe.
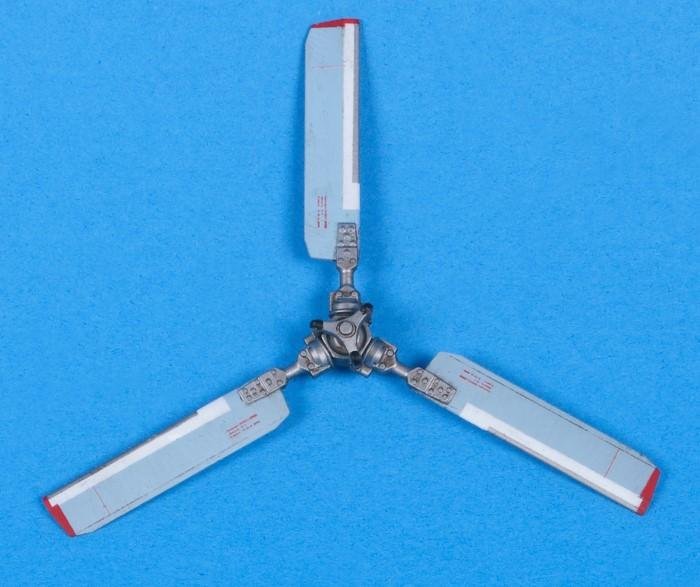
Rotors, both main and tail, comprise multiple components with excellent moulded detail, which again benefit from careful masking and painting. A degree of refining and touch-up work was required at the point where the blades clamp on to the main hub assembly, as otherwise the seam was noticeable. Stencil data provided within the D48060 set also includes sectional markings for the upper surfaces of the main blades –a neat, albeit fiddly touch.
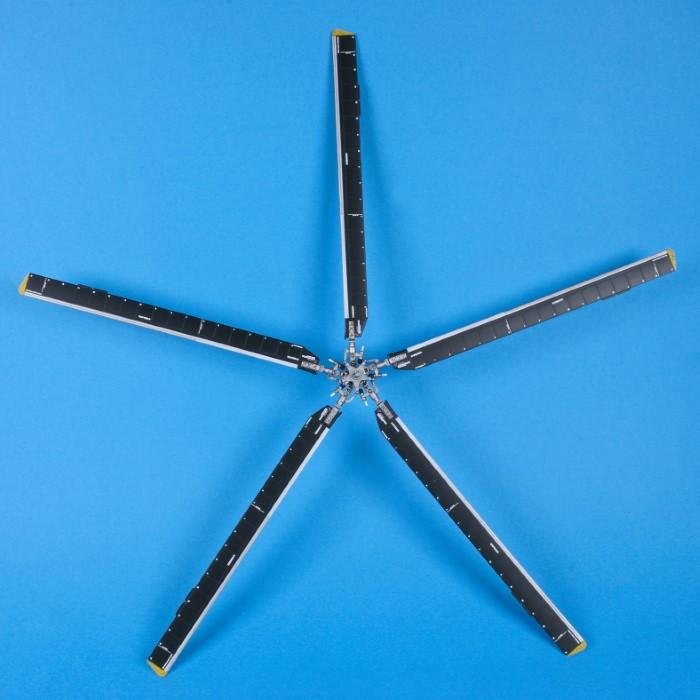
Above and below: Stencil data provided within the Eduard D48060 set also includes sectional markings for the main rotors, a neat addition, although these were fiddly to apply.
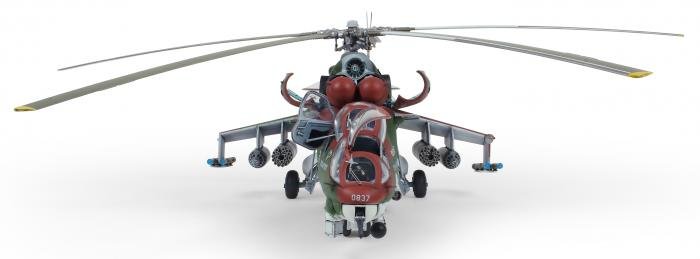
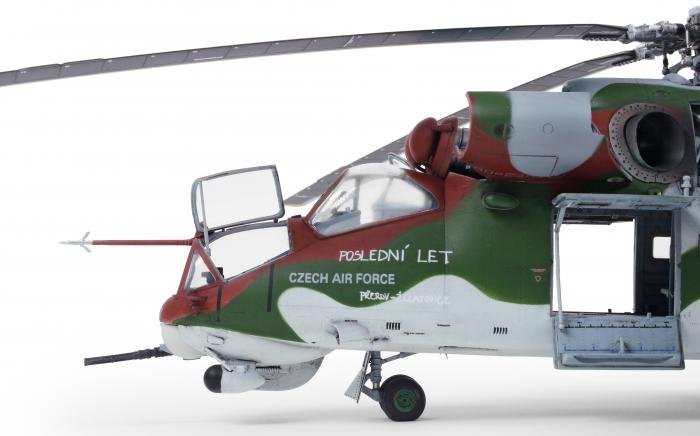
Striking scheme
Czech Air Force Mi-24V, 0837 – as depicted in Eduard’s decal set D48054 – features four-tone upper-surface camouflage. Paint references are supplied for several manufacturers, but in this case, these were mapped on to AK Interactive’s Real Color equivalents. The scheme was applied darkest colour first over a base coat of RC253 Light Grey (FS 36495), which was then pre-shaded with diluted Tamiya XF-1 Black (www.hobbyco.net) to accentuate the rivet detail. As then applied, the camouflage colour sequence was RC067 Rot (Rotbraun) RAL 8012, RC083 Green (FS 34102) and RC251 Dark Ghost Grey (FS 36320).
Thinly-rolled White Tack was used to set the edges of the scheme and the respective colour was applied in thin sprayed coats, allowed to dry thoroughly, after which masking for the next tone was added. This approach provides a neat, yet very subtle soft edge to the overall scheme – curves cut from cardboard allowed some edges to be sharpened via airbrush, where required. Finer details were then hand-painted, with the work to date sealed under two diluted layers of Klear to prepare the model for decaling.
Markings taken from Eduard’s Czech Air Force sheet (D48054) proved easy to handle, being in good register and thin. Small amounts of AK582 Decal Adaptor Solution were all that was needed to ensure good adhesion and settling, even over the previously applied rivet detail. A coat of Klear sealed the decals and A.MIG-1602 Dark Grey Panel Line Wash (PLW) was applied to pick out the surface features and add a used look to the airframe. A final application of MRP-127 Super Clear Matt sealed and muted the overall finish.
On the pad
Removal of the cockpit masking, followed by fixing of the cockpit and cabin doors plus engine panels in their open positions, completed a very enjoyable, detailed build of what is undoubtedly the new benchmark for a 1/48 Hind. The number of aftermarket additions may seem excessive to some, as the kit-supplied items deliver an acceptable level of detail, but this was a personal choice and one that this modeller couldn’t resist.
REFERENCES
• www.airforce-technology.com/ projects/hind/
• www.military.wikia.org/wiki/Mil_Mi-24#Czech_Republic
• www.army.cz/en/armed-forces/ equipment/air-force/helicopters/default.htm
• MIL Mi-24/35 Hind, by Jakub Fojtik (Mushroom Model Publications), ISBN: 978-836-528153-1
• New Vanguard-171: MIL Mi-24 Hind Gunship, by Alexander Mladenov (Osprey), ISBN: 978-1-84603-953-9