V0.4 Enabling Camera Controls
OctoPi uses mjpg-streamer to create a camera stream, which allows you to monitor your printer via OctoPrint. Mjpg-streamer has the ability to change some camera settings via control.htm. Additionally, mjpg-streamer can create a description of your camera's controls and capabilities, accessible via a file called input.json. Since mjpg-streamer has no authentication or authorization capability, it was decided to disable all access to these pages within OctoPi by default.
If you have not used port-forwarding or some other insecure methods to view your OctoPi instance through the internet, these pages are generally safe to use. If these pages are available, Octolapse can take advantage by using them to create a screen that allows you to control your camera's settings.
- Mjpg-streamer must be installed.
- Some plugins that create their own camera stream must be disabled. Currently this includes OctoPrint Anywhere and The Spaghetti Detective. These are both great plugins, but they are incompatible with custom camera controls.
If you are using a Raspberry Pi Camera, the steps are a bit different. See this comprehensive guide for using a Raspberry Pi Camera.
If you don't know how to connect to your Raspberry Pi, see this guide. When you are connected, continue on to step 2 below.
Open your octopi.txt file with the nano editor by entering the following command followed by the Enter key:
sudo nano /boot/octopi.txt

You may be prompted to enter your password. After the command completes, you will see the nano text editor. Use the arrow keys and edit this section (it may look slightly different than what is pictured here, but it should be close):
Next, using the arrow keys move down to the bottom of the octopi.txt file and find the following section:

change the following text
#camera_http_webroot="./www-octopi"
#camera_http_options="-n"
to this:
camera_http_webroot="./www"
camera_http_options=""
Be sure to remove any # characters at the beginning of the lines! It should look like this when you are finished:

While you're here, you might want to adjust your camera's resolution and frame rate. Find the camera_usb_options section and edit those now. For example, if you want a 1080P image at 30 frames per second, you would use the following:
camera_usb_options="-r 1920x1080 -f 30"
Be sure to refer to your camera's documentation when choosing a resolution and frame rate. Not all resolutions and frame rates are available for all cameras.
Make sure to remove any # characters from the beginning of the line!
and the end result will look something like this:

**Note: The higher the resolution and frame rate, the more bandwidth and CPU power will be used. Higher frame rates will reduce the image acquisition time (possibly improving quality, especially when using a smart trigger with snap-to-print enabled). Also, some versions of Firefox will have trouble showing a high frame rate mjpegstream, but Chrome seems to do just fine. Your mileage may vary, but if you have problems, try lowering your frame rate from 30 frames per second to 10 frames per second.
Now we want to save the file and exit nano. Hold down the ctrl key and press the letter O (so ctrl+O) to save the file. Press enter to confirm. Then press ctrl+X to exit.
Finally, reboot your Pi by entering the following command followed by the Enter key:
sudo reboot

You may need to enter your password again if prompted. If you are using Putty, your session will end with an error. Wait until your Raspberry Pi has rebooted completely and then verify that OctoPrint is ready by opening it in a new browser window.
If you don't want to change the settings of an existing camera profile (perhaps because you have multiple cameras), the steps below will walk you through adding a new camera profile. If you only have one camera, you can skip this step and move on to Step 4
Open up OctoPrint in a browser window and click on the Octolapse tab. Make sure the Current Settings are expanded. If they are not visible, click on the Current Run Configuration link.
Then open up the camera profiles page within the Octolapse settings by clicking on the 'Cameras' link:

Next click on the Add Profile... button.

Name your profile so you can easily identify the camera. I'm going to use ACME Webcam in this example. Once you are finished lick on the Save button.

Now exit the OctoPrint settings popup by clicking Cancel at the bottom right hand corner.

Click the edit icon next to your your camera profile.

This will open up the existing camera profile settings. If you want to rename your profile, feel free to do so now.
Next, make sure that you are not using an imported profile by selecting `Not Selected' from the dropdown box.

Make sure that the Camera Type dropdown box is set to Webcam. Your settings will look something like this:

Now we need to verify the Snapshot Address Template. Make sure your camera can take snapshots by clicking on the 'Test' button. If it is successful, it will look like this:

If the test failed, you will see this message:

If your test has failed, see this troubleshooting guide for help getting the Snapshot Address Template working.
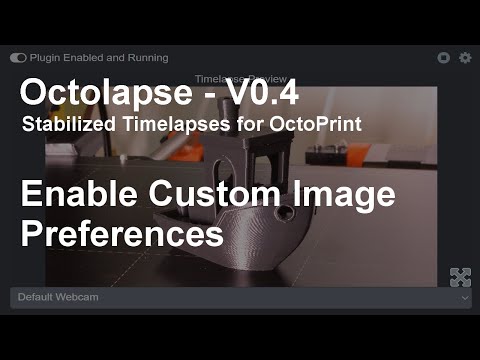
Find the Custom Image Preferences section within the camera profile and check the Enabled check box:

If you see an error like this, follow the troubleshooting guide here:

If custom image preferences were successfully enabled, you will see three new options:
- Apply Preferences at Startup - When this option is enabled Octolapse will apply the saved image preferences after OctoPrint boots. I've gotten a few reports that some USB cameras take a long time to come online, preventing Octolapse from applying the settings after a reboot. I've since altered the routine so that Octolapse will retry for a minute or two.
- Apply Preferences Before Print Start - Enabling this option will cause Octolapse to apply the camera settings at the start of a print.
- Apply Preferences When Camera is Disabled. You can disable cameras selectively within Octolapse, but you may still want your custom image preferences applied. When this option is enabled, Octolapse will still apply settings to disabled cameras according to the Apply Preferences at Startup and Apply Preferences Before Print Start settings.
All three should be enabled by default. Your settings should now look like this:

Now, save your profile by clicking the Save button:

Next, select your timelapse preview camera in the dropdown on the Octolapse tab found here:

You will now see a message explaining that no snapshots are available for the webcam. This is normal, and you won't see any snapshots here until you run a print with Octolapse enabled.
Next, click the edit pen to the right of the camera you just selected to open the image preferences:

If everything is working properly, you will be able to see your camera stream at the top of the popup, which will look similar to this:

If the stream is not working, you will see something like this:

If your camera stream will not load, see this troubleshooting guide.
Dialing in your camera settings is very important for getting a high quality timelapse. Before you start, it is important that you have adequate lighting. Good lighting is critical for getting a high quality timelapse, and it might (but probably won't) even improve your print quality by reducing the snapshot acquisition time! Photography LEDs work great, but cheap LEDs that use low frequency pulse width modulation (PWM) might result in a lot of flicker in your final timelapse. Incandescent and halogen bulbs will work well, but they use a lot more power than LED lights. In general, you will want your lighting to be much brighter than is necessary to just see your prints.
I also recommend that you close any blinds in the room with the printer because the light levels in the room may vary, messing up the exposure and leading to a lower quality timelapse.
Once you have improved your lighting, it's time to adjust the camera settings.
The controls you see will depend on which webcam you are using, so the popup should look similar to, but maybe not exactly like this:

- Camera Stream - Here you will find your live camera stream. Any changes you make to your camera settings will appear here after a brief delay.
- Stabilize Extruder - This will first home your extruder's X and Y axis according to your printer profile's *Home Axis Gcode Script *. Next your extruder should move into the snapshot position. This should make it easier to focus your camera properly for your timelapse. If you are using one of the the Snap to Print smart triggers or if stabilization is disabled, this will not work.
- Apply All Settings Now - Octolapse must remain in sync with your camera, but sometimes things go wrong. For example, if you change your camera settings with another application or if you disconnect and reconnect it after booting your Pi, the settings might not be applied to your camera. Clicking this button will force all settings to be applied to your camera.
- Switch to Default Page/Switch to Custom Page - A few cameras have special custom pages associated with them. Currently, several Logitech webcams and Raspberry Pi cameras have custom pages that are enhanced with grouping, validation, and other features that enhance usability. This button can be used to switch between the two if a custom page is available. If the button says Switch to Custom Page but no page is available, you will see an error message.
- Switch to Single Column/Switch to Two Columns - By default, your controls will be shown as two newspaper style columns. If you prefer a wider format, you can switch to single column mode, which can make it a bit easier to control the sliders.
- Specific Camera Detected - If Octolapse knows what kind of camera you are using, it will be shown here. Octolapse detects cameras based on their feature set and default settings, and these can change with driver or mjpg-streamer updates. If Octolapse cannot detect your camera type, you won't have access to a Custom Control Page.
- Cancel - This will undo all of the changes that were made since you opened the popup, but only if your camera settings were properly synchronized when you opened the popup (see item 3).
- Defaults - Here you can restore your camera's default settings. Please note that some cameras do not properly report the default settings, so this may not work perfectly for all cameras or versions of mjpg-streamer.
- Save - If you are happy with your settings adjustments, click save to store them.
There are three types of controls you may see within the image preferences popup:
- Sliders - All settings that are associated with numeric controls will appear as a slider. Each slider has a minimum and maximum value as well as a step. For example, my camera allows the focus to be set between 0 and 250 in increments of 5. Because of this, a value of -10 or 32 is invalid, so the slider will not allow you to select these values. Note: A few people have asked for the option to use a text box to manually enter a value. This is not possible at the moment, but I am considering adding this feature.
- Check Boxes - These are toggle controls that can be on or off.
- Dropdown Boxes - These contain a list of possible values that you may choose from.
Sometimes the camera controls interact with one another. For example, on my camera the Focus setting will have no effect unless Autofocus is disabled. The custom pages (if they are available) will usually make this obvious by disabling or enabling some controls based on other settings. Custom pages also contain help links (blue question marks) next to each setting, which you can use to learn more about each control. The default pages do NOT do either of these things.
I recommend spending a lot of time tuning your camera settings. Some settings are more important than others, and your settings may need to change based on lighting, camera position, the color of the filament you are printing with, etc., so they will need regular adjustments. I pretty regularly see people asking what settings they should use, but it's very unlikely that my settings will work for you, even if we have the exact same camera. For this reason, it's easier to explain my method for adjusting my own camera settings. That way you can come up with the best settings for your unique situation.
This step is critical to getting good image quality. A good rule of thumb is that you should use more lighting than you think is necessary. You should also make sure that the lighting conditions will not change during your print, so I recommend closing the blinds and shutting the doors. Avoid turning lights on and off during your print or else you will definitely notice this in your video.
This is a bit more art than science. Ideally, you want to choose an angle that will show the entire print. Play around with your positioning and see what works best for you.
The first thing I usually adjust is the focus. If your camera has manual focus, most of this still applies, but you won't be able to adjust the focus directly through Octolapse. You should check your focus any time you adjust your stabilization position or if you move your camera.
In order to get the focus right, it's important that your bed and extruder are in the right position. Fortunately, Octolapse can stabilize your bed on demand, making this pretty easy.
Important Note: Octolapse cannot stabilize your bed if you are using any of the Snap to Print triggers or if stabilization is disabled. In this case it may be a bit trickier to focus your camera because the stabilization position is unknown until after the snapshot plan is generated. Additionally, for Animated stabilizations, Octolapse will stabilize to the first position in the animation.
Before you attempt to stabilize your extruder, make sure that your bed is clear! If not, your extruder may crash into whatever is sitting on your bed, potentially damaging your printer. Octolapse will ask you to check your bed before sending any Gcode to your printer.
Once you have checked your bed to make sure it is totally empty, click on the Stabilize Extruder button:

Octolapse will now ask you to confirm that you want to home and stabilize the XY axis. Click Ok only if your bed is clear. Your printer should immediately home and then move into the stabilization position:

In order to make it a bit easier to adjust the focus, I recommend putting an object on your bed in the same position that your printed object will be located. Preferably this object has some text on it because I find that it's easier to tell if an object is in sharp focus if it has text on it. You may need to raise your Z axis in order to fit an object on the bed depending on where your extruder is. Use the OctoPrint control tab for this:

First select the Control tab. You can move your Z axis using these controls:
- Raise your extruder
- Lower your extruder
- Control how far your extruder will move in MM.
Important Note: Some printers move the entire bed when the Z axis is changed. If your printer is like this and you find that your controls are flipped (up appears to lower your bed and down appears to raise it), you can correct this by editing your OctoPrint (NOT Octolapse) printer profile, enabling the Invert control option to correct this:

Now place the object of your choice on your bed:

If your camera has manual focus (like the Raspberry Pi Camera), adjust it until the image is sharp. For cameras that have a focus control setting, first disable Autofocus if your camera has that option:
Next, I recommend the following procedure:
- Disable Auto-Focus if it is enabled (your camera may or may not have this control or it may look different):

- Move the focus slider all the way to the left and wait for the camera stream to adjust:

- Slowly raise the focus until your object first appears to be in focus (it is probably NOT in perfect focus at this point), and make a note of the value:

- Continue to increase the focus. It will probably be difficult to tell if the image is getting any better, but be patient. Continue to increase the focus until the image appears to be less in focus than it was before and make a note of this value.

- Find the point on your focus slider that is between the two numbers you recorded. In the example above the proper setting would be 35. If you cannot select this value (it may not be valid for your camera), select the next LOWER value. This should be the optimal focus setting:

If you move your camera, change your stabilization position, or if the size/shape of the object you want to print changes, be sure to readjust your focus!
Note: Not all values are valid for focus for every camera. My camera supports increments of 5 for this setting. For example, if I think that a value between 40 and 45 is ideal, I cannot select 42.5 because it is not supported by the camera.
Next, I recommend adjusting your exposure and gain if your camera supports these options. Make sure you have adequate lighting and that it is set up and turned on now. I also recommend closing your blinds to keep the light levels in your room stable. The lighting conditions should NOT change from now until your print is completed.
Before adjusting your exposure, be sure your Brightness and Contrast are set to the default (usually right in the middle of the slider), if your camera supports those controls. This is what my defaults look like on my Logitech C920:

The exposure settings control how much light your camera will take in. Underexposed images will be dark and lack definition. Over exposed images will be washed out. Here are the available exposure controls for a Logitech C920:

Some cameras have an Automatic Exposure setting or a drop-box option somewhere that needs to be selected in order to adjust exposure. You may need to play around in order to figure out how to manually adjust your exposure. Here is how you switch to manual exposure on my Logitech C920:

You want to use as low an exposure setting as possible while maintaining good image quality. If your camera supports gain controls, it's usually better to have a higher gain and lower exposure, since higher exposure times can sometimes increase the time it takes for Octolapse to acquire an image. It is a balancing act, though, because high gain values may lead to artifacts or inaccurate colors or your light levels may be too low for the gain alone to compensate for. Experiment a while to determine what works best for your camera and lighting conditions. Here are the settings I am currently using, but keep in mind that I make sure I adjust this before every print:

Another important setting to adjust is the white balance. Using Automatic white balance can cause a flickering timelapse, so it's best to use manual settings. Some cameras have individual adjustments for red and blue, and some only have color temperature. The goal here is to have the image colors in your stream match real life.
Many cameras have an automatic setting for this. You should select Manual if possible, though your controls may look different than mine. For my Logitech C920 I have to first disable automatic white balance (your controls may look altogetehr different):

I try to adjust my white balance until the color looks as true to reality as I can. Here is what I came up with, though your settings may be totally different:

Your exact settings will depend on the color of your lighting, of your model, your aesthetic tastes, and the capabilities of your camera. Play around until you are happy with what you see.
Other obvious settings you may want to look at include Brightness, Contrast, Saturation, Sharpness, Bitrate or Quality, Pan, Tilt and Zoom, and Power Line Frequency. Your camera may not support all of these controls and may have other interesting things you may want to try.
- Brightness - Controls how bright or dark your image will be. This is independent of the Exposure setting discussed above and should be adjusted after you set your exposure.
- Contrast - This controls the difference between the brightest and darkest parts of your image. A higher contrast means that shadows and highlights will be more clearly defined. A lower contrast makes the image appear a bit flat.
- Saturation - This is the lightness or darkness of a specific range of colors. Some cameras have separate saturation settings for the red, green, and blue (or CYMK) channels, and some have a single saturation setting that applies to all colors evenly. Increasing this will make colors appear more vibrant but less true-to-reality. Lowering the setting will eventually remove all colors from your image, leaving you with a black and white image.
- Sharpness - This setting enhances brightness along edges. It can make features more defined at higher settings, but it may create an undesirable halo or jagged edges if it gets too high.
- Bitrate or Quality - Not all cameras have this setting, and the name varies pretty widely. Turning this up will make your image more clear and less blocky but will increase bandwidth. I've noticed that in some cameras this setting has no effect, and in others (Raspberry pi) it makes a huge difference. You generally want to crank this setting as high as it will go.
- Pan, Tilt, and Zoom - Controls the direction and scale of your image. Some cameras are motorized and have real pan, tilt, and zoom, while others have digital versions. My camera requires a zoomed in image before pan or tilt will work. If your camera supports any of these settings, play around with them. I use pan and tilt pretty often to help center my part in the snapshot.
- Power Line Frequency - The frequency of your power may cause flickering in your image. Many cameras have built-in correction for this. Check out this link to find out what frequency is used in your area, and select the appropriate frequency for this setting if it is available.
Next, I recommend you investigate the other settings your camera offers. If you run into trouble, you can click the Defaults button at the bottom to restore all of the default camera settings. When you are finished adjusting your image, click 'Save' at the bottom to store the settings and close the popup.
Congratulations! Your USB Webcam is all configured!
Remember to check your image quality and adjust it as necessary before every timelapse. There is nothing more frustrating than capturing a great timelapse of a great print, only to discover that it is out of focus or washed out. If you adjust your camera settings in the middle of a timelapse, you WILL notice it, so it's best to check before your print starts. Also, when your print is running, be sure that your lighting conditions stay stable. Keep the blinds and doors closed, and don't turn on/off the lights in the middle of a print!