
If you’re new to film photography, you might here the name Lomography. But what is Lomography? Lomography is a unique form of photography that uses lo-fi methods and quirky equipment to create interesting and unpredictable results. Named after the Lomo LC-A camera, lomography celebrates the happy accidents and creative surprises that can happen when shooting photos with unconventional tools and techniques.
What is Lomography?
Lomography is both a company and a community of ambitious photographers. The Lomographic Society International was founded in 1992 by a few Austrian students. It aimed to inspire artists to be wild and free using their analog cameras.
The name comes from a Russian camera from the 80s, the Lomo LC-A. This was a quirky piece of equipment that photographed everything vibrantly.
Today, Lomography has expanded. They have over 1 million members and a store filled with creative equipment to improve your photography. They also have an Instagram account that features artists. The members call themselves lomographers.
Even though the community is active, you don’t need to sign up to be a part of it. You need to keep their rules in mind and use the right equipment.
What Makes Lomography so Unique?
Lomography stands out because it’s analog. You’ll need to use a specific camera with a specific type of film to re-create popular lomography pictures.
The effect itself is easy to describe. Lomo pictures are oversaturated, high in contrast, and soft. Some might even describe them as cross-processed.
The backgrounds tend to be blurry because lomography lenses have very large apertures. You can create interesting and vibrant double exposures using lomography’s equipment.
Another thing that makes the community stand out is the people. According to a study, people who often use their analog cameras tend to be less attached to social media.
Many of them are active online. But they don’t feel the need to check their phones all the time. And they could survive without the Internet for a long period of time.
They attribute this to their cameras. These allow them to connect with the present moment and not worry about technology too much.
Lomography is an art movement first and a community second. But it’s inspiring photographers to be intuitive and present. Like its unique effects, this makes it stand out from every other kind of analog photography.
Lomography’s Golden Rules
Lomography has 10 golden rules that every member must follow. This may seem intimidating. But it’s supposed to free photographers from self-made rules and limitations.
Here are a few of its main rules and why they matter:
- Take your camera everywhere you go and shoot at any time of day. This isn’t meant to pressure you. It’s meant to provide you with more opportunities to express yourself. It’s also a great rule for those who always plan their photoshoots. Your best photos are waiting in the most unexpected places.
- Take photos from unique angles. Instead of looking through your viewfinder all the time, shoot from the hip. Or try a completely different angle. This will help you keep your photos fresh and interesting.
- Connect with your subjects by getting close to them. This will create a sense of intimacy that will make your results easier to relate to.
- Don’t overthink it. Thinking too much about a concept might result in unnecessary fears and procrastination.
- Capture everything. Again, don’t think too much about your shots. Let your intuition do the work for you and you’ll surprise yourself with what images you capture.
- Don’t limit yourself with specific rules. No matter how experienced you are, don’t think about guidelines all the time. Instead, trust your creative vision and be as free as your heart desires.
Most lomographers follow these rules and, as a result, take incredible photos.
What Equipment Should You Use for Lomography?
Lomography sells cameras, lenses, film, and accessories. If you use any of these, you’ll be able to consider yourself a member of the lomography team.
The equipment varies in price and is available to people with all kinds of budgets.
You’ll notice that most of the bestselling lomography cameras cost less than $200. Some of them even come with a set of lenses.
What you choose depends on your style. It seems like lomography has something for everyone. Wide, disposable, instant, and even a kit for building a camera yourself!
Lomography film is what makes this art movement stand out. You can buy film that will make your photos look purple, oversaturated, and more. Generally, the prices range between $10 – $120 for several rolls of film.
Lomography’s lenses are unique. Most of them have very large apertures. Some come with special effects like swirly bokeh or very low clarity for a dreamy effect. The cheapest ones are meant for creative experiments.
The lenses are the most expensive equipment on the website, ranging from $20 to over $1000.
Last but not least, Lomography offers fun accessories. These include flashes, camera straps, notebooks, and more.
If you want to try out alternative photography at home, you can do so using their cyanotype kit.
How to Re-Create the Lomography Effect in Photoshop
There are many different ways to create the lomo effect in Photoshop. One of the easiest methods involves four steps only.
First, add a vignette to your image. This will darken the edges of your image and put the focus on the center of the composition.
Create a round selection using the Elliptical Marquee tool. Right-click your selection, and choose Invert.
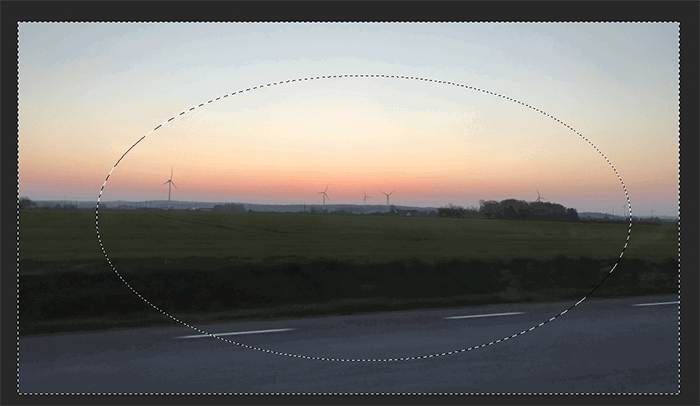
Right-click again, select Feather, and add a large number (like 80) so the vignette transition is soft.
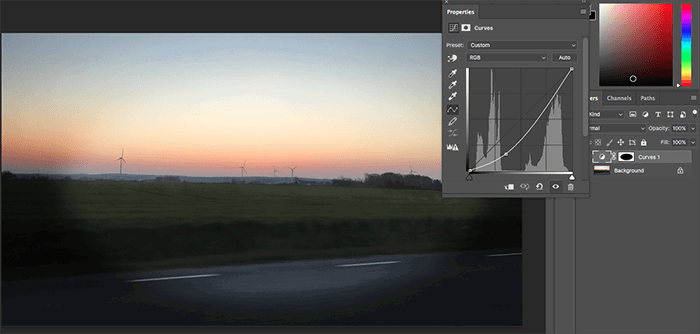
You can then darken the vignette using a tool like Curves, as pictured below.
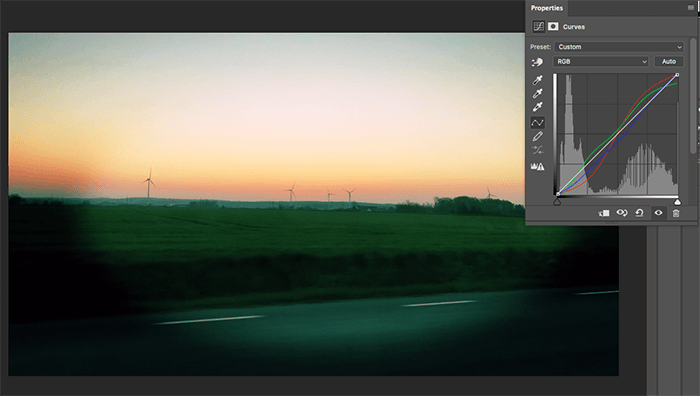
Next, create a cross-processed effect in Curves. Your aim is to experiment with the Red, Green, and Blue curves. There’s no right or wrong way to do this.
Pull parts of the curve in different direction to create quirky color combinations.
The last two steps are optional but will enhance your photo.
You can blur the edges of your photo to make it seem like you took your photo using a very old camera.
Create a duplicate layer and go to Filter > Blur > Gaussian Blur. Then, create a layer mask and paint over the area you’d like to keep sharp.
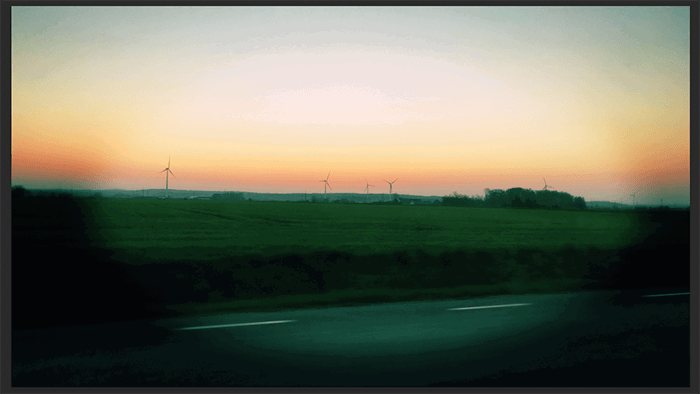
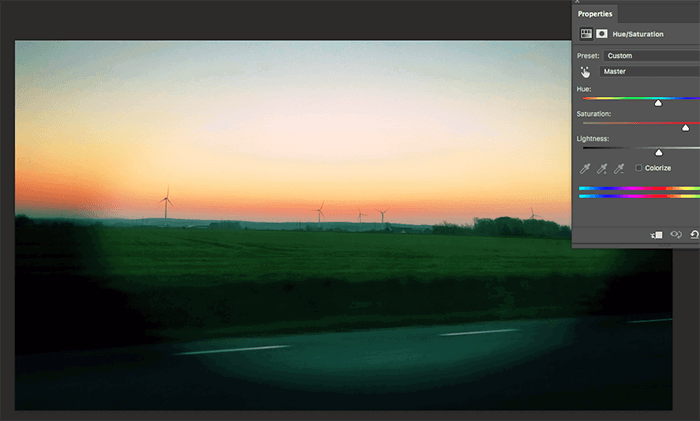
You can also saturate your final results even more to boost the lomo effect even more. Go to Image > Adjustments > Hue/Saturation.
Conclusion
Lomography is not only a welcoming community, but also a powerful art movement.
Using lomography’s famous equipment, you can take gorgeous analog photographs.
You’ll learn how to be more present with your photography at the same time.
